آموزش AlertDialog چند گزینه ای (multiple choice) در کاتلین
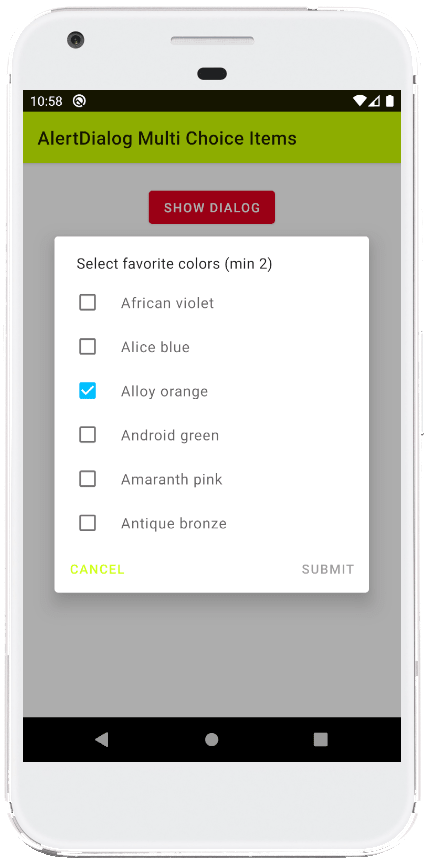
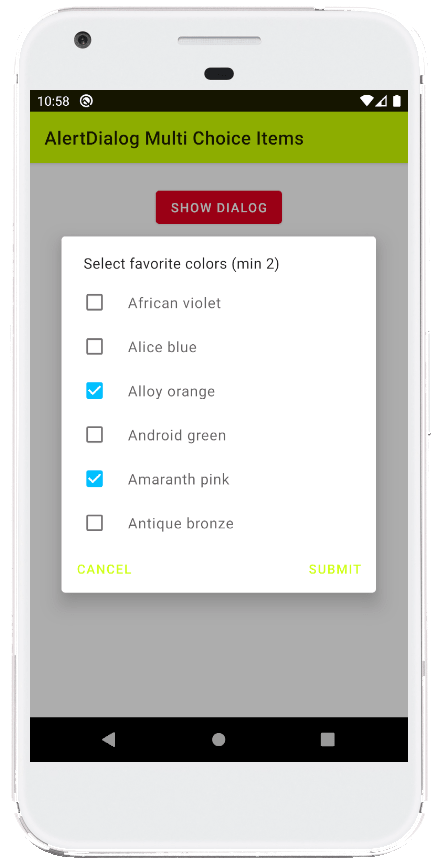
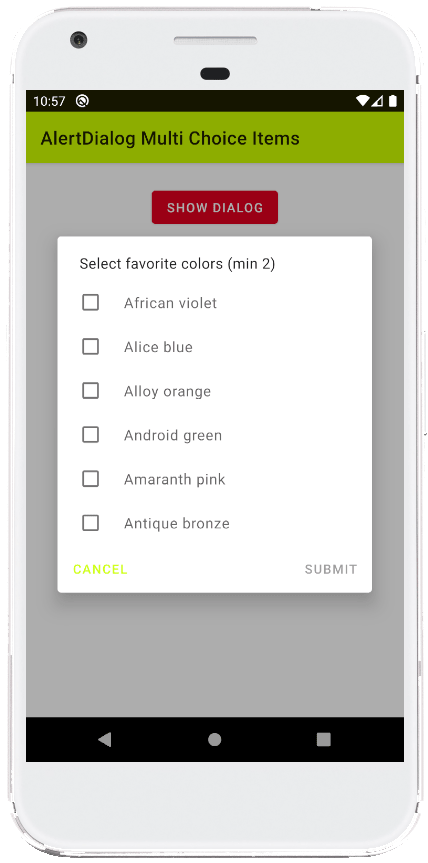
سلام به همه ی دوستان عزیز در این سری از آموزش برنامه نویسی اندروید به آموزش AlertDialog چند گزینه ای (multiple choice) در کاتلین می پردازیم در واقع این نوع AlertDialog شامل Checkbox درون خود هست که در ادامه می توانیم پیش نمایشی از این آموزش را مشاهده کنید با ما همراه باشید.

از پیش نمایش که بگذریم به بخش کد می رسیم ابتدا در لایه خود یک دکمه و یک TextView همانند زیر قرار دهید.
1 2 3 4 5 6 7 8 9 10 11 12 13 14 15 16 17 18 19 20 21 22 23 24 25 26 27 28 29 30 | <?xml version="1.0" encoding="utf-8"?> <androidx.constraintlayout.widget.ConstraintLayout xmlns:android="http://schemas.android.com/apk/res/android" xmlns:app="http://schemas.android.com/apk/res-auto" xmlns:tools="http://schemas.android.com/tools" android:layout_width="match_parent" android:layout_height="match_parent" android:id="@+id/constraintLayout" tools:context=".MainActivity"> <com.google.android.material.button.MaterialButton android:id="@+id/button" android:layout_width="wrap_content" android:layout_height="wrap_content" android:layout_marginTop="24dp" android:text="Show Dialog" android:backgroundTint="#E30022" app:layout_constraintEnd_toEndOf="parent" app:layout_constraintStart_toStartOf="parent" app:layout_constraintTop_toTopOf="parent" /> <TextView android:id="@+id/textView" android:layout_width="wrap_content" android:layout_height="wrap_content" android:layout_marginTop="32dp" tools:text="TextView" android:textAppearance="@style/TextAppearance.AppCompat.Large" app:layout_constraintEnd_toEndOf="parent" app:layout_constraintStart_toStartOf="parent" app:layout_constraintTop_toBottomOf="@+id/button" /> </androidx.constraintlayout.widget.ConstraintLayout> |
زمانی که بروی دکمه کلیک شد Alert ما نمایش داده خواهد شد در Textview هم متن رنگ های انتخابی نمایش داده می شود.
کدهای مربوط به Mainactivity.kt هم همانند زیر خواهد بود.
1 2 3 4 5 6 7 8 9 10 11 12 13 14 15 16 17 18 19 20 21 22 23 24 25 26 27 28 29 30 31 32 33 34 35 36 37 38 39 40 41 42 43 44 45 46 47 48 49 50 51 52 53 54 55 56 57 58 59 60 61 62 63 64 65 66 67 68 69 70 71 72 73 74 75 76 77 78 79 | import android.os.Bundle import android.widget.AdapterView import androidx.appcompat.app.AlertDialog import androidx.appcompat.app.AppCompatActivity import com.google.android.material.dialog.MaterialAlertDialogBuilder import kotlinx.android.synthetic.main.activity_main.* class MainActivity : AppCompatActivity() { private var initialCheckedItems = mutableListOf<Boolean>() override fun onCreate(savedInstanceState: Bundle?) { super.onCreate(savedInstanceState) setContentView(R.layout.activity_main) val context = this button.setOnClickListener { val builder = MaterialAlertDialogBuilder(context) // dialog title builder.setTitle("Select favorite colors (min 2)") val colors = arrayOf( "African violet", "Alice blue", "Alloy orange", "Android green", "Amaranth pink", "Antique bronze" ) if (initialCheckedItems.isEmpty()){ repeat(colors.count()) {initialCheckedItems.add(false)} } builder.setMultiChoiceItems( colors, initialCheckedItems.toBooleanArray() ) { dialog, which, isChecked ->} // alert dialog positive button builder.setPositiveButton("Submit"){dialog,which-> val alertDialog = dialog as AlertDialog val sparseBooleanArray = alertDialog.listView.checkedItemPositions var counter = 0 textView.text = "" colors.forEachIndexed { index, s -> if (sparseBooleanArray.get(index, false)) { textView.append("\n$s") counter += 1 } } if (counter > 0) { textView.text = "Selected colors: " + textView.text } } // alert dialog neutral button builder.setNeutralButton("Cancel"){dialog,which-> textView.text = "" } // set dialog non cancelable builder.setCancelable(false) // finally, create the alert dialog and show it val dialog = builder.create() dialog.show() // initially enable disable the positive button if((initialCheckedItems.filter { it }).size < 2){ dialog.getButton(AlertDialog.BUTTON_POSITIVE).isEnabled = false } // dialog list item click listener dialog.listView.onItemClickListener = AdapterView.OnItemClickListener { parent, view, position, id -> val sparseBooleanArray = dialog.listView.checkedItemPositions var checkedItems = 0 colors.forEachIndexed { index, s -> if (sparseBooleanArray.get(index,false)){ checkedItems +=1 initialCheckedItems[index] = true }else{ initialCheckedItems[index] = false } } dialog.getButton(AlertDialog.BUTTON_POSITIVE) .isEnabled = checkedItems >=2 } } } } |
ابتدا در بالا یک لیست از نوع Muteable ایجاد شده که حالت های مربوط به Checkbox را برای ما نگهداری می شود بعد از آن رویداد مربوط به دکمه را می بینید.
در ادامه می بینید که یک نمونه از MaterialAlertDialogBuilder ایجاد شده است.
آرایه ای به نام colors داریم که متن رنگ ها در آن قرار گرفته است
setMultiChoiceItems : در واقع این متد دو ورودی دارد اولی لیستی از متن های ما هست و دومی state مربوط به checkbox هاست که به صورت پیشفرض تمامی آنها false قرار گرفته اند. (unchecked)
setPositiveButton : دکمه مواق Alert را تنظیم می کند و همینطور رویداد مربوط به کلیک بروی این دکمه
setCancelable : به منظور اینکه اگر کاربر بیرون از کادر AlertDialog کلیک کرد dialog همچنان نمایش داده شود یا خیر اگر برابر با false باشد با کلیک بیرون alert دیالوگ بسته نخواهد شد و برای true برعکس
onItemClickListener : رویداد مربوط به آیتم های لیست یا رنگ های ما را تنظیم می کند تا متوجه شویم آیتمی کلیک شده است یا خیر
setNeutralButton : دکمه کنسل را تنظیم می کند.
خط آخر هم به منظور بررسی اینکه تعداد آیتم های انتخاب شده به 2 رسیده یا خیر اگر رسیده بود دکمه موافق یا Positive را فعال می کند.
موفق و پیروز باشید.
 آموزش برنامه نویسی اندروید |


